まずはHelloWorldAppDelegate.hから見てみる
もう一回くどいようですが、ソースを貼付けて
ソースをみてみたいと思います。
#import <UIKit/UIKit.h>

@interface MainView : UIView
{
    UITextView *textView;
}

@end

@interface HelloWorldAppDelegate : NSObject <UIApplicationDelegate> {
    UIWindow *window;
    MainView *myMainView;
}

@property (nonatomic, retain) IBOutlet UIWindow *window;

@end
ここはヘッダなので、宣言文になっています。
まずは@interfaceのところですが、
となっています。
@propertyはメソッド宣言と同じような意味でインスタンス変数に対して
アクセサメソッドを準備するためのものとなり、
@property (属性) 型名 プロパティ名;
となります。
今回、属性で指定されているのはnonatomicとretainです。
調べてみると
| 種類 | 説明 |
|---|---|
| retain | オブジェクトを保持(retain)して設定 |
| nonatomic | スレッド内でメソッドは排他的に実行しなくて良い |
説明を見る限り、今の所、気にすることはなさそうですが、
今の僕には動きが少し読みづらいので、まずは、このまま進めてみます。
次にvHelloWorldAppDelegate.mも読んでみる
とりあえず、ヘッダはなんとなく分かったので
次は本命のHelloWorldAppDelegate.mで進めてみます。
ちょっと長いので、まずは先に呼び出される
HelloWorldAppDelegateからやってみます
@implementation HelloWorldAppDelegate

@synthesize window;

- (void)applicationDidFinishLaunching:(UIApplication *)application {

    CGRect screenBounds = [[UIScreen mainScreen] applicationFrame];
    CGRect windowBounds = screenBounds;
    windowBounds.origin.y = 0.0;

    self.window = [[UIWindow alloc] initWithFrame: screenBounds];

    myMainView = [[MainView alloc] initWithFrame: windowBounds];

    [window addSubview:myMainView];

    // Override point for customization after application launch
    [window makeKeyAndVisible];
}

- (void)dealloc {
    [myMainView release];
    [window release];
    [super dealloc];
}

@end
まずはimplementationはクラス定義です。
基本的にはこのような書き方になります。
@implementation クラス名
メソッド定義
@end
独自クラスであればヘッダファイルのinterface部分に記載する必要がありますが
今回はDelegateとしてapplicationDidFinishLaunchingとdeallocはオーバライドしているだけなので
宣言する必要はありません。
で、中身で、まずは最初の3行
    CGRect screenBounds = [[UIScreen mainScreen] applicationFrame];
    CGRect windowBounds = screenBounds;
    windowBounds.origin.y = 0.0;
ここで、ステータスバー(1番上の電波状況とか出てる部分)を除く部分を返します。
そして、Windowの右上を0×0に指定しています。
    self.window = [[UIWindow alloc] initWithFrame: screenBounds];

    myMainView = [[MainView alloc] initWithFrame: windowBounds];

    [window addSubview:myMainView];
ここで親としてwindowを作成して、そこにMainViewをwindowのSubViewとして貼付けています。
- (void)dealloc {
    [myMainView release];
    [window release];
    [super dealloc];
}
これはHelloWorldAppDelegateクラスが解放される時に呼ばれ、
その中で今まで作成したオブジェクトを解放しています。
最後にMyViewクラスを見てみる
@implementation MainView

- (id)initWithFrame:(CGRect) rect{
	self = [super initWithFrame:rect];

	if(self != nil){
		textView = [[UITextView alloc] initWithFrame:rect];
		textView.text = @"Hello World!";

		[self addSubview:textView];
	}

	return self;
}

-(void)dealloc{
	[textView release];
	[super dealloc];
}

@end
HelloWorldAppDelegateでMainViewのインスタンスを作成する時
initWithFrameで指定したパラメータで親のViewを作成し、
その中で親のviewに"Hello World!"と書いたtextViewを貼付けて表示します。
deallocはさっきのHelloWorldAppDelegateと一緒でオブジェクトの解放処理です。
ViewControllerを使って表示してみる
前回はUIViewを作成して表示してみましたが、
今回はViewControllerを使って"Hello World"してみたいなぁと思います
今回もお世話になる本はこれです。

iPhone SDK Application Development: Building Applications for the AppStore
- 作者: Jonathan Zdziarski
- 出版社/メーカー: O'Reilly Media
- 発売日: 2009/02/06
- メディア: ペーパーバック
- 購入: 2人 クリック: 110回
- この商品を含むブログ (14件) を見る
これのp.54にあるソースを写経します。
ControllerDemoという名前で「Windows-Based Application」で作成します。
そこでできたプロジェクト内のフォルダ「Classes」を選択し
「ファイル」→「新規ファイル」→「UIviewController subClass」を選択し、ControllerDemoViewControllerと名前を付けて保存します。
作成されたファイルに対するソースはこれです。
ControllerDemoViewController.h
#import <UIKit/UIKit.h>


@interface ControllerDemoViewController : UIViewController {
	NSString *helloWorld, *woahDizzy;
	UITextView *textView;
}

@end
ControllerDemoViewController.m
#import "ControllerDemoViewController.h"

@implementation ControllerDemoViewController

- (id)init {
	self = [super init];

	if(self != nil){
		helloWorld = [[NSString alloc] initWithString:@"Hello World!"];
		woahDizzy = [[NSString alloc] initWithString:@"Woah, I'm Dizzy!"];
	}

	return self;
}

- (void)loadView {
	[super loadView];

	textView = [[UITextView alloc] initWithFrame:[[UIScreen mainScreen] applicationFrame]];

	textView.text = helloWorld;
	self.view = textView;
}

// 横向けた時に反応するかどうか。今回は反応させるためにYES
- (BOOL)shouldAutorotateToInterfaceOrientation:(UIInterfaceOrientation)interfaceOrientation {
    // Return YES for supported orientations
    return YES;
}

// 横にした時にwoahDizzyの文言を放り込む
- (void)didRotateFromInterfaceOrientation: (UIInterfaceOrientation)fromInterfaceOrientation{
    textView.text = woahDizzy;
}

- (void)didReceiveMemoryWarning {
    [super didReceiveMemoryWarning]; // Releases the view if it doesn't have a superview
    // Release anything that's not essential, such as cached data
}

- (void)dealloc {
    [helloWorld release];
    [woahDizzy release];
    [textView release];
    [super dealloc];
}

@end
肝心のControllerDemoAppDelegateはこの通りです。
ControllerDemoAppDelegate.h
#import <UIKit/UIKit.h>

@class ControllerDemoViewController;

@interface ControllerDemoAppDelegate : NSObject <UIApplicationDelegate> {
    UIWindow *window;
    ControllerDemoViewController *viewController;
}

@property (nonatomic, retain) IBOutlet UIWindow *window;
@property (nonatomic, retain) IBOutlet ControllerDemoViewController *viewController;

@end
ControllerDemoAppDelegateクラスの中身はこんな感じです。
ControllerDemoAppDelegate.m
#import "ControllerDemoAppDelegate.h"
#import "ControllerDemoViewController.h"

@implementation ControllerDemoAppDelegate

@synthesize window;
@synthesize viewController;

- (void)applicationDidFinishLaunching:(UIApplication *)application {

    CGRect screenBounds = [[UIScreen mainScreen] bounds];

    self.window = [[[UIWindow alloc] initWithFrame:screenBounds] autorelease];

    viewController = [[ControllerDemoViewController alloc] init];

    // Override point for customization after application launch
    [window addSubview:viewController.view];
    [window makeKeyAndVisible];
}

- (void)dealloc {
    [viewController release];
    [window release];
    [super dealloc];
}

@end
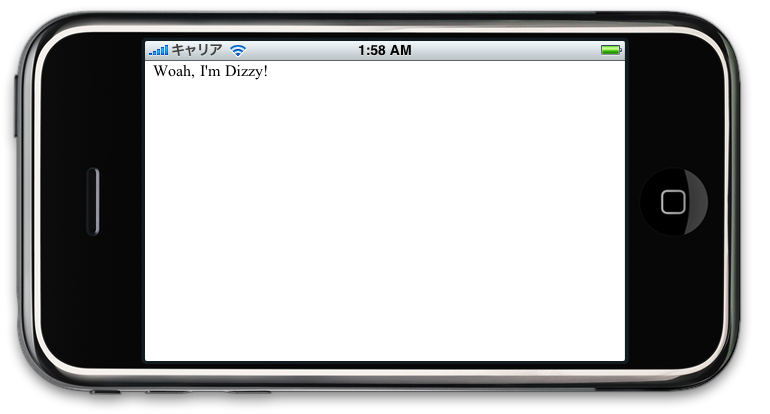
駆け足ですが、ビルドしてシミュレータで動かしてみるとこんな感じになるはずです。
横向けにした時には文言が変わりますね。

