昨日作ったSearchBarの下にTableViewを出してみる
昨日作ったSearchBarの下にTableViewを出したいので
出してみることにします。
AppDelegateは何も変わりません。
初めTopViewControllerをUITableViewControllerにしてたら
親Viewに直接SearchBarを貼付ける事になってしまい、
TableViewの位置が変更できず、1行目が隠れてしまったので
TopViewControllerにUITableViewを作成し、SubViewとして貼付けます。
TopViewController.h
#import <UIKit/UIKit.h>


@interface TopViewController : UIViewController <UISearchBarDelegate, UITableViewDelegate, UITableViewDataSource> {
	UISearchBar		*searchBar;
	UITableView		*hotKeywordTableView;
	NSArray  	        *hotKeywordData;
}

@property (nonatomic, retain) NSArray *hotKeywordData;

@end
TopViewController.m
#import "TopViewController.h"


@implementation TopViewController

@synthesize hotKeywordData;

-(id)init{
	self = [super init];
	if(self != nil){

	    hotKeywordData = [[NSArray alloc] initWithObjects:nil];

	}
	return self;
}

// Implement loadView to create a view hierarchy programmatically, without using a nib.
- (void)loadView {
	[super loadView];

	CGRect bounds = [[UIScreen mainScreen] applicationFrame];

	searchBar = [[UISearchBar alloc] initWithFrame:CGRectMake(0.0, 0.0, bounds.size.width, 48.0)];
	searchBar.delegate = self;
	searchBar.placeholder = @"キーワードを入れてください";

	[self.view addSubview:searchBar];
	hotKeywordTableView = [[UITableView alloc] initWithFrame:CGRectMake(0.0, 48.0, bounds.size.width, bounds.size.height - 48.0)];
	hotKeywordTableView.delegate = self;
	hotKeywordTableView.dataSource = self;
	[self.view addSubview:hotKeywordTableView];
	[hotKeywordTableView reloadData];
}

// テーブルのセクションの数を返す
-(NSInteger)numberOfSectionsInTableView:(UITableView *)tableView{
	return 1;
}

// テーブルのレコード数を返す
-(NSInteger)tableView:(UITableView *)tableView numberOfRowsInSection:(NSInteger)section{
	return [hotKeywordData count];
}

// このメソッドはテーブルのレコード数だけループして呼ばれる。
// indexPathにはループのセル番号(0スタート)が入る
-(UITableViewCell *)tableView:(UITableView *)tableView cellForRowAtIndexPath:(NSIndexPath *)indexPath{
	// セルのオブジェクトに付ける名前の文字列を生成する
	NSString *CellIdentifier = @"HotKeyword";

	// HotKeywordと言う名前の再利用可能なセルのオブジェクトを生成する
	UITableViewCell *cell = [tableView dequeueReusableCellWithIdentifier:CellIdentifier];

	// もし生成されていなかったら、セルのオブジェクト生成する
	if(cell == nil){
		cell = [[[UITableViewCell alloc] initWithFrame:CGRectZero reuseIdentifier:CellIdentifier] autorelease];
	}

	cell.text = [hotKeywordData  objectAtIndex:indexPath.row];
	return cell;
}

// Implement viewDidLoad to do additional setup after loading the view, typically from a nib.
- (void)viewDidLoad {
    [super viewDidLoad];
}

- (void)viewDidAppear:(BOOL)animated {
	[super viewDidAppear:animated];
}

- (void)dealloc {
	[hotKeywordData release];
	[hotKeywordTableView release];
	[searchBar release];
        [super dealloc];
}

@end
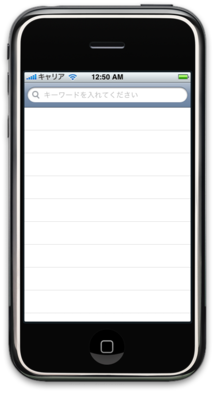
こんなん出ました!
テーブル、だいぶ分かってきた!
ちょっとイマジネーションが湧いてきたんで、UISearchbarを使いたい
iPhoneのアプリ作りたいなぁと思いつつ、何も作りたいものが湧いてきて来なかったんですが
少し、アイディアが出てきました!
なんで、それに使いたいなぁと思う検索バー(UISerachBar)を出してみたいと思います。
構成としてはプロジェクトは「Windows-Based Application」で「HogeHoge」と作成し、
サブクラスとして「UIviewController subClass」でViewControllerを作成したものとしてください。
できたファイル構成はこれです。今回もInterface Builderは使いません。
- HogeHogeAppDelegate.h
- HogeHogeAppDelegate.m
- TopViewController.h
- TopViewController.m
もう、後は簡単にソースを。
TopViewController.h
#import <UIKit/UIKit.h>


@interface TopViewController : UIViewController <UISearchBarDelegate> {
	UISearchBar		*searchBar;
}
TopViewController.m
#import "TopViewController.h"

@implementation TopViewController

// Implement loadView to create a view hierarchy programmatically, without using a nib.
- (void)loadView {
	[super loadView];
	CGRect bounds = [[UIScreen mainScreen] applicationFrame];

	searchBar = [[UISearchBar alloc] initWithFrame:CGRectMake(0.0, 0.0, bounds.size.width, 48.0)];
	searchBar.delegate = self;
	searchBar.placeholder = @"キーワードを入れてください";
	[self.view addSubview:searchBar];
}

- (void)didReceiveMemoryWarning {
    [super didReceiveMemoryWarning]; // Releases the view if it doesn't have a superview
    // Release anything that's not essential, such as cached data
}

- (void)dealloc {
    [searchBar release];
    [super dealloc];
}

@end
HatenaKeywordAppDelegate.h
#import <UIKit/UIKit.h>
#import "TopViewController.h"

@interface HatenaKeywordAppDelegate : NSObject <UIApplicationDelegate> {
    UIWindow *window;
    TopViewController *topViewController;
}

@property (nonatomic, retain) IBOutlet UIWindow *window;
@property (nonatomic, retain) IBOutlet TopViewController *topViewController;

@end
HatenaKeywordAppDelegate.m
#import "HatenaKeywordAppDelegate.h"
#import "TopViewController.h"

@implementation HatenaKeywordAppDelegate

@synthesize window;
@synthesize topViewController;


- (void)applicationDidFinishLaunching:(UIApplication *)application {

    self.window = [[UIWindow alloc] initWithFrame:[[UIScreen mainScreen] bounds]];

    topViewController = [[TopViewController alloc] init];

    // Override point for customization after application launch
    [window addSubview:topViewController.view];
    [window makeKeyAndVisible];
}


- (void)dealloc {
    [topViewController release];
    [window release];
    [super dealloc];
}


@end
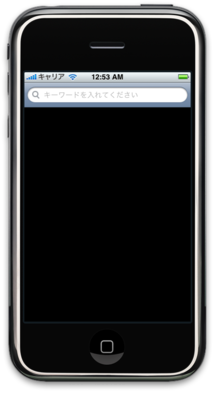
これでコンパイルするとこんな感じになりました。
まだ、検索バーがでてるだけですが、ここから少し足していきたいなぁと思います。
コンパイルや!
さて、コンパイルされる前にEclipse側で設定しておく必要があります。
プロジェクトを選択し、右クリックから「プロパティ」をクリックします。
開いたウィンドゥで「C/C++ 一般」→「パスおよびシンボル」を選択し、「インクルード」から「追加」ボタンを押し、"/opt/local/include/opencv"を選んでOpenCVのヘッダファイルの場所を指定します。
次にライブラリの場所を指定するために同じ「C/C++ 一般」→「パスおよびシンボル」から「Library Paths」を選択し、「追加」ボタンを押し、"/opt/local/lib"を選びます。
最後に実際に引き込むライブラリを指定します。
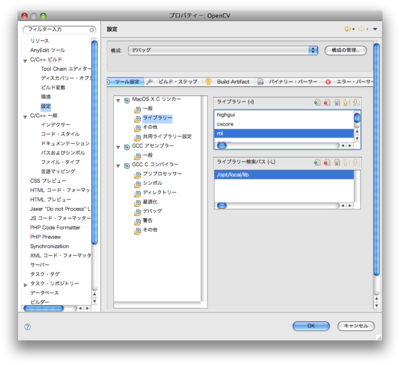
開いているプロパティのウィンドゥから「C/C++ ビルド」→「設定」→「ツール設定」から「MAC OS X リンカー」→「ライブラリー」を選択します。
そこから追加で各ライブラリ(highgui,cxcore,ml,cvaux,cv)を追加します。
これでビルド可能になりました!
しかし、ビルド後のファイルを実行するとこんな結果に。。。。
# ./OpenCV
カメラが見つかりませんでした
う〜ん、なんでやろ。。。
さてさて、コード書いてみる
今回もお世話になった本にご登場願います。

- 作者: 奈良先端科学技術大学院大学 OpenCVプログラミングブック制作チーム
- 出版社/メーカー: 毎日コミュニケーションズ
- 発売日: 2007/09/22
- メディア: 単行本(ソフトカバー)
- 購入: 10人 クリック: 1,006回
- この商品を含むブログ (35件) を見る
はい、これのp.52のサンプルを書いてみます。
さて、viで書くかIDEで書くか悩んだんですが、Eclipseで書いてみたいと思います。
まずは、「ファイル」→「新規」→「Cプロジェクト」を選択します。
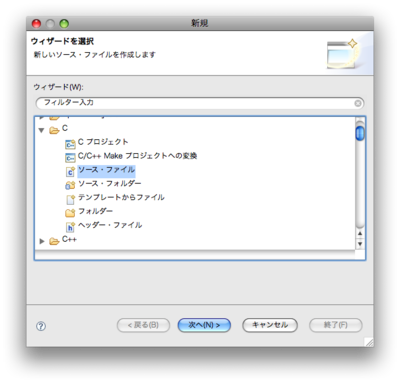
出来たプロジェクトを選択し、右クリックし、「新規」→「その他」で
Cのソースファイルを選びます
適当な名前でファイルを作成し、下記のコードを入れてみます。
#include <stdio.h>
#include <highgui.h>

int main(int argc, char** argv){
	int key;                              // キーボードから入力されたキー格納用変数
	CvCapture *capture;                   // カメラキャプチャ用構造体
	IplImage *frameImage;                 // キャプチャ画像
	char windowNameCapture[] = "Capture"; // キャプチャ画像を表示するウィンドウの名前

        // カメラ初期化
	if((capture = cvCreateCameraCapture(0)) == NULL){
                // カメラが見つからなかった時
		printf("カメラが見つかりませんでした");
		return -1;
	}

        //ウィンドウ作成
	cvNamedWindow(windowNameCapture, CV_WINDOW_AUTOSIZE);

        // メインループ
	while(1){
                // カメラからの入力画像の1フレームをframeImageに格納する
		frameImage = cvQueryFrame(capture);

                // 作成したウィンドウに取得したフレームを表示する
		cvShowImage(windowNameCapture, frameImage);

                // 1ミリ秒の間にキーボードから入力されたキーを取得する
		key = cvWaitKey(1);

                // qが入力されていたら終了
		if(key == 'q'){
			break;
		}
	}

        // キャプチャを解放する
	cvReleaseCapture(&capture);

        // ウィンドウを終了する
	cvDestroyWindow(windowNameCapture);


	return 0;
}


